本文最后更新于:星期四, 二月 3日 2022, 9:15 晚上
写在前面
前段时间沉迷VPS,就用手头的VPS搭建了v2rayN
宝塔安装
| curl -sSO http://download.bt.cn/install/new_install.sh && bash new_install.sh
|
安装时,一路默认即可,该输入 Y 的输入 Y,没什么难度。
安装完成,会出现面板地址及默认账号与密码,如下图。(注意新版本在端口号后面还有一个字符串,一定要全部保存,)
如果不记得了可以通过
查看
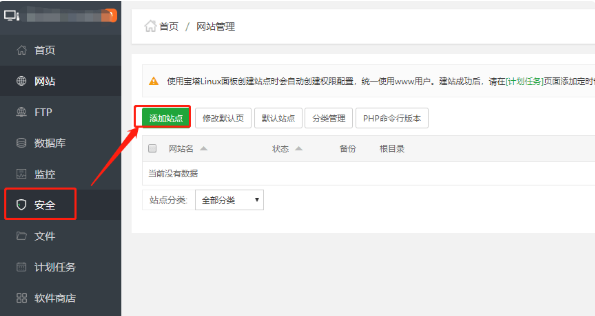
进入对应的地址后,只选择安装nginx
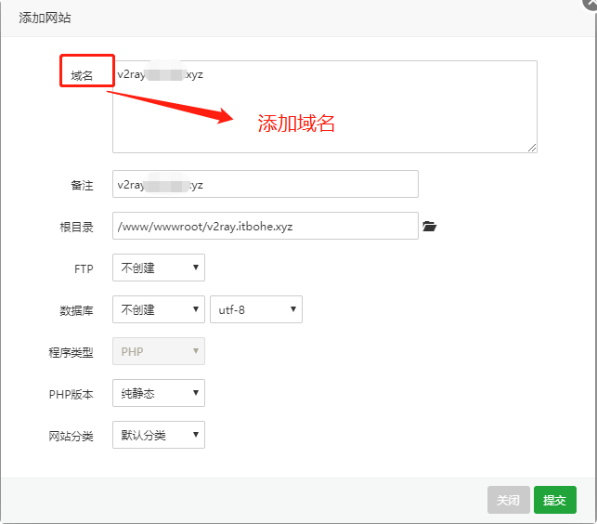
然后添加站点
安装v2rayN
通过官方脚本安装
| bash <(curl -L -s https://install.direct/go.sh)
|
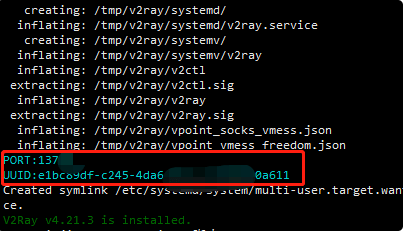
记住你的port和UUID
如果不记得了可以通过
|
cat /etc/v2ray/config.json | grep port
cat /etc/v2ray/config.json | grep id
|
然后配置网站的SSL
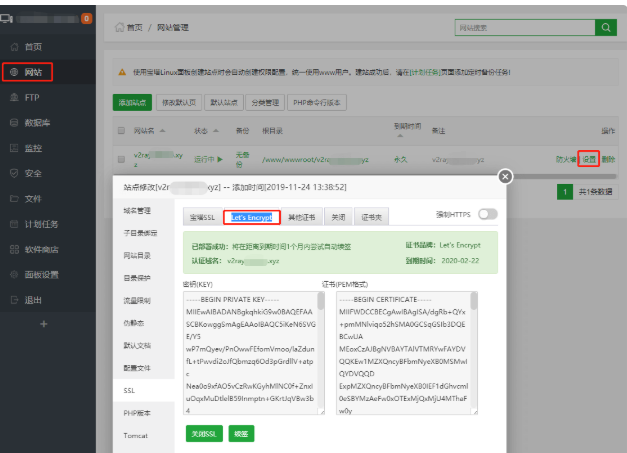
通知勾选强制HTTPS
修改配置文件:
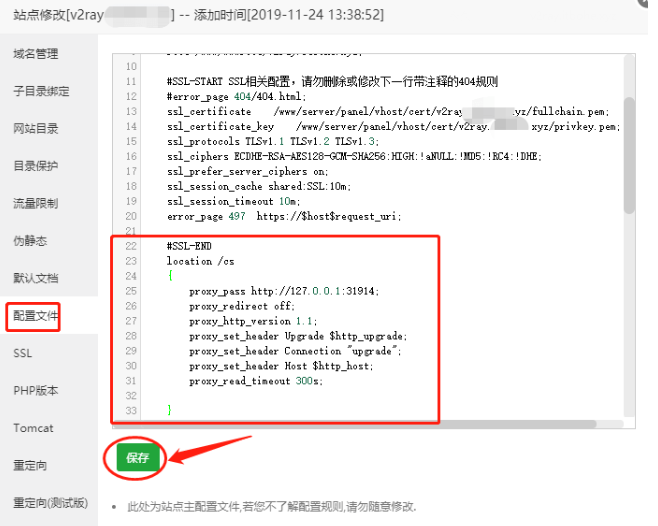
接下来进入 修改网站配置文件 点击配置文件,找到 #SSL-END,大概在 22 行左右,在其下面添加如下代码:
| location /cs
{
proxy_pass http://127.0.0.1:你的端口号;
proxy_redirect off;
proxy_http_version 1.1;
proxy_set_header Upgrade $http_upgrade;
proxy_set_header Connection "upgrade";
proxy_set_header Host $http_host;
proxy_read_timeout 300s;
}
|
1、其中第一行的 cs 是你自己 ws 的 path,斜杠不要删除,可以自己修改,也可以不改;
2、还记得用官方脚本安装 v2ray 后出现的 port 吗,我叫大家记住的,这个 port 后面的就是你的端口号。修改上面代码后保存,如下图:
接下来才是重点,配置 V2ray 配置文件:
进入 /etc/v2ray 目录,编辑 config.json 文件 将里面全部代码改为:
1
2
3
4
5
6
7
8
9
10
11
12
13
14
15
16
17
18
19
20
21
22
23
24
25
26
27
28
29
30
31
32
33
34
35
36
37
38
39
40
41
42
43
44
45
46
47
48
49
50
51
52
53
54
55
56
57
58
59
60
61
62
63
64
65
66
67
68
69
70
71
72
73
74
75
76
| {
"policy": {
"levels": {
"0": {
"uplinkOnly": 0,
"downlinkOnly": 0,
"connIdle": 150,
"handshake": 4
}
}
},
"inbound": {
"listen": "127.0.0.1",
"port": 31914, //这里填写你的 v2ray 端口号,复制脚本请产出这句注释
"protocol": "vmess",
"settings": {
"clients": [
{
"id": "e1bc89df-c245-4da6-90cc-2d20ad80a611", //这里填写你的 v2ray UUID,复制脚本请删除这句注释
"level": 1,
"alterId": 32
}
]
},
"streamSettings": {
"network": "ws",
"security": "auto",
"wsSettings": {
"path": "/cs", //这里填是你自己 ws 的 path,如果修改配置文件的时候没有修改过就不管,复制脚本请删除这句注释
"headers": {
"Host": "www.xxx.com" //这里填写你的域名,复制脚本请删除这句注释
}
}
}
},
"outbound": {
"protocol": "freedom",
"settings": { }
},
"outboundDetour": [
{
"protocol": "blackhole",
"settings": { },
"tag": "blocked"
}
],
"routing": {
"strategy": "rules",
"settings": {
"rules": [
{
"type": "field",
"ip": [
"0.0.0.0/8",
"10.0.0.0/8",
"100.64.0.0/10",
"127.0.0.0/8",
"169.254.0.0/16",
"172.16.0.0/12",
"192.0.0.0/24",
"192.0.2.0/24",
"192.168.0.0/16",
"198.18.0.0/15",
"198.51.100.0/24",
"203.0.113.0/24",
"::1/128",
"fc00::/7",
"fe80::/10"
],
"outboundTag": "blocked"
}
]
}
}
}
|
启动v2rayN
|
systemctl start v2ray
service v2ray start|stop|status|reload|restart|force-reload
|
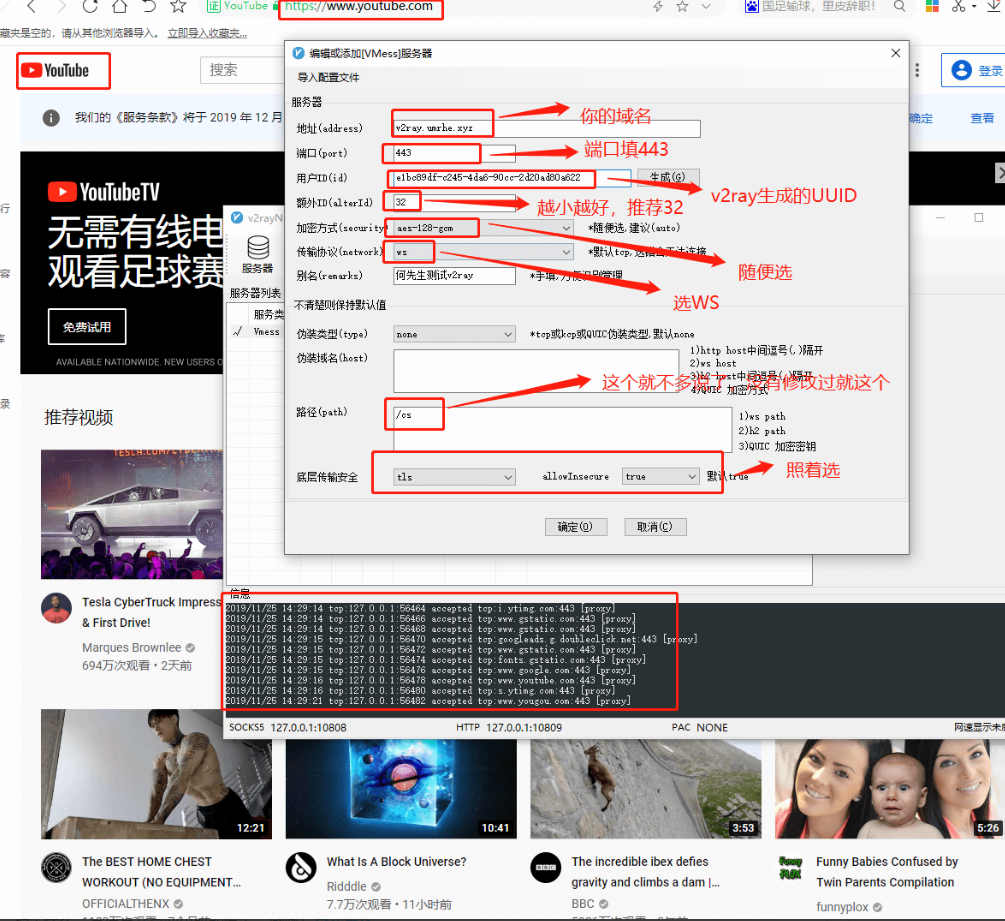
客户端配置
杂
检测IP是否被封可以通过
https://www.vps234.com/ipchecker/
进行检测
查看端口可以通过
https://www.toolsdaquan.com/ipcheck/
测速可以通过
|
wget https://raw.githubusercontent.com/oooldking/script/master/superspeed.sh
chmod +x superspeed.sh
./superspeed.sh
|
或者
| bash <(curl -Lso- https://git.io/superspeed)
|
v2rayN 代理 git 操作
| git config --global http.proxy http://127.0.0.1:10809
git config --global https.proxy https://127.0.0.1:10809
git config –-get –-global http.proxy
git config --global --unset https.proxy
git config --global --unset http.proxy
|